Step 1: Define Your Website Goals
Think through four key questions:
- Is your website for brand showcase, lead generation, or content operations?
- Who is your target audience?
- What action do you want visitors to take?
- What pages do you need?
Common pages include:
- Homepage
- About Us
- Products or Services
- Case Studies or Customer Results
- Blog or Content Pages
- Contact Us
Step 2: Write Your Initial Requirements
We recommend writing your requirements as a combination of “goal + style + pages + features + conversion actions”.
Example:
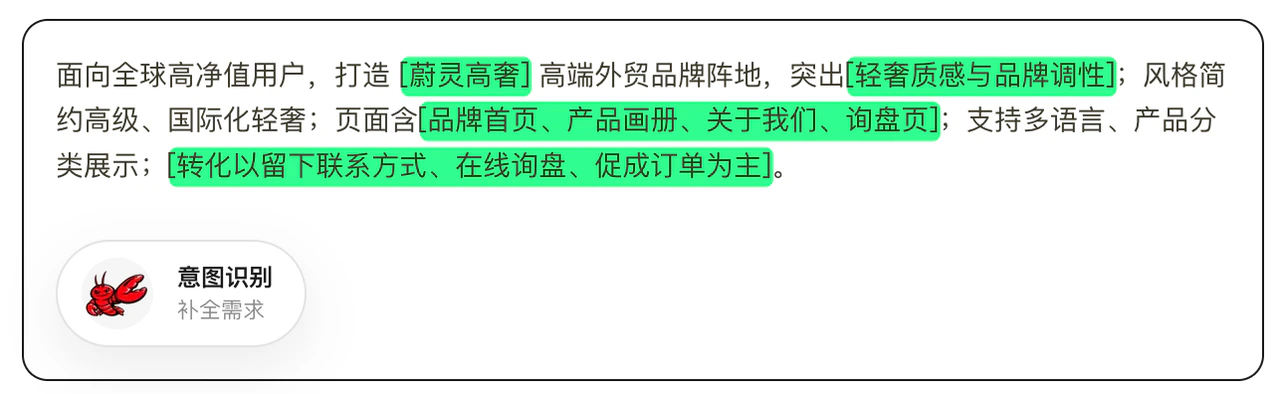
Targeting global high-net-worth clients, build a [WeiLing Luxury] high-end foreign trade brand presence, emphasizing [luxury quality and brand identity]; style: minimalist, premium, internationalized luxury; pages include [brand homepage, product catalog, about us, inquiry page]; support multilingual, product category display; [conversion focused on collecting contact information, online inquiries, and facilitating orders].
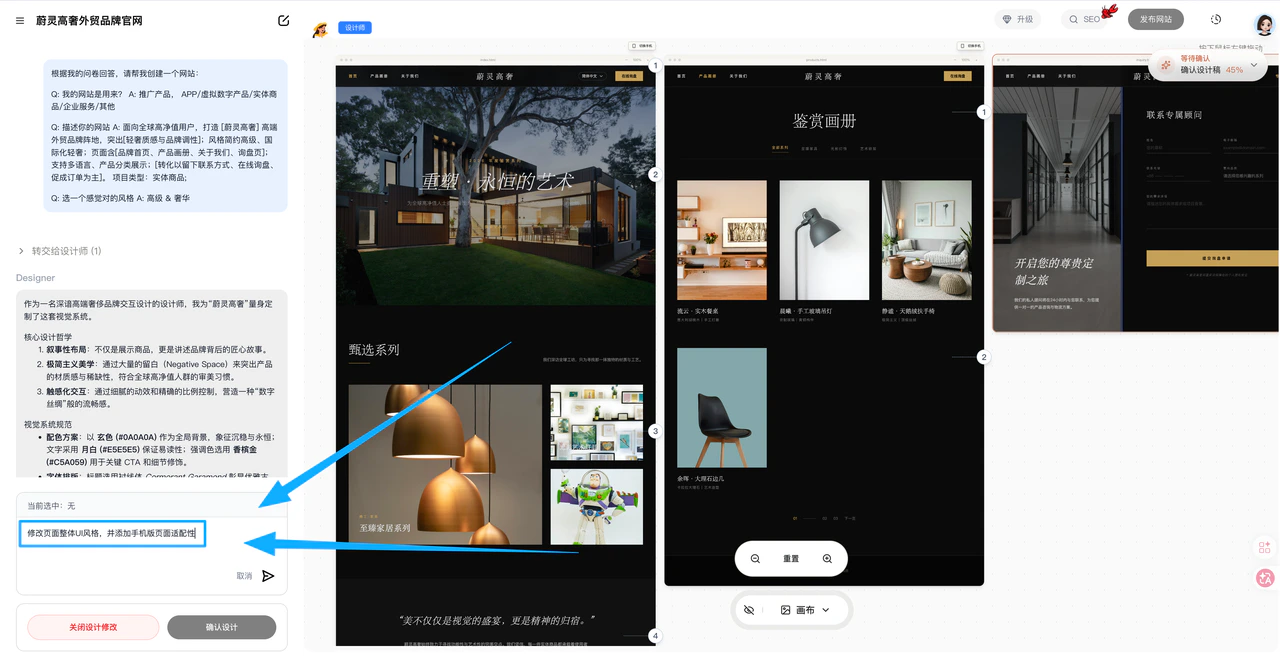
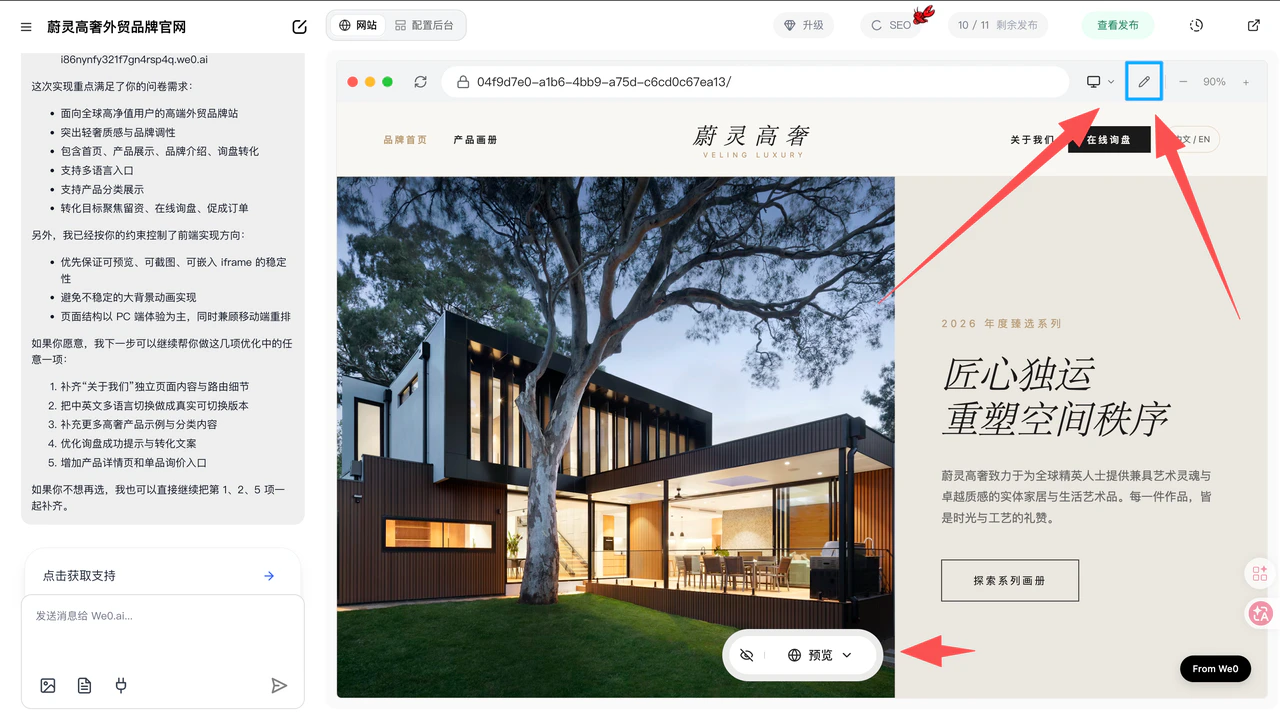
Step 3: Generate Initial Design Draft
We recommend confirming the overall direction first — don’t click “Confirm Design” yet. Make refinements in the design draft stage.The platform will generate an initial design based on your input, typically covering:
- Website page structure (layout)
- Website functionality
- Visual direction (UI main visual)
- Basic website content
Example: Review the overall content first, don’t click confirm design yet

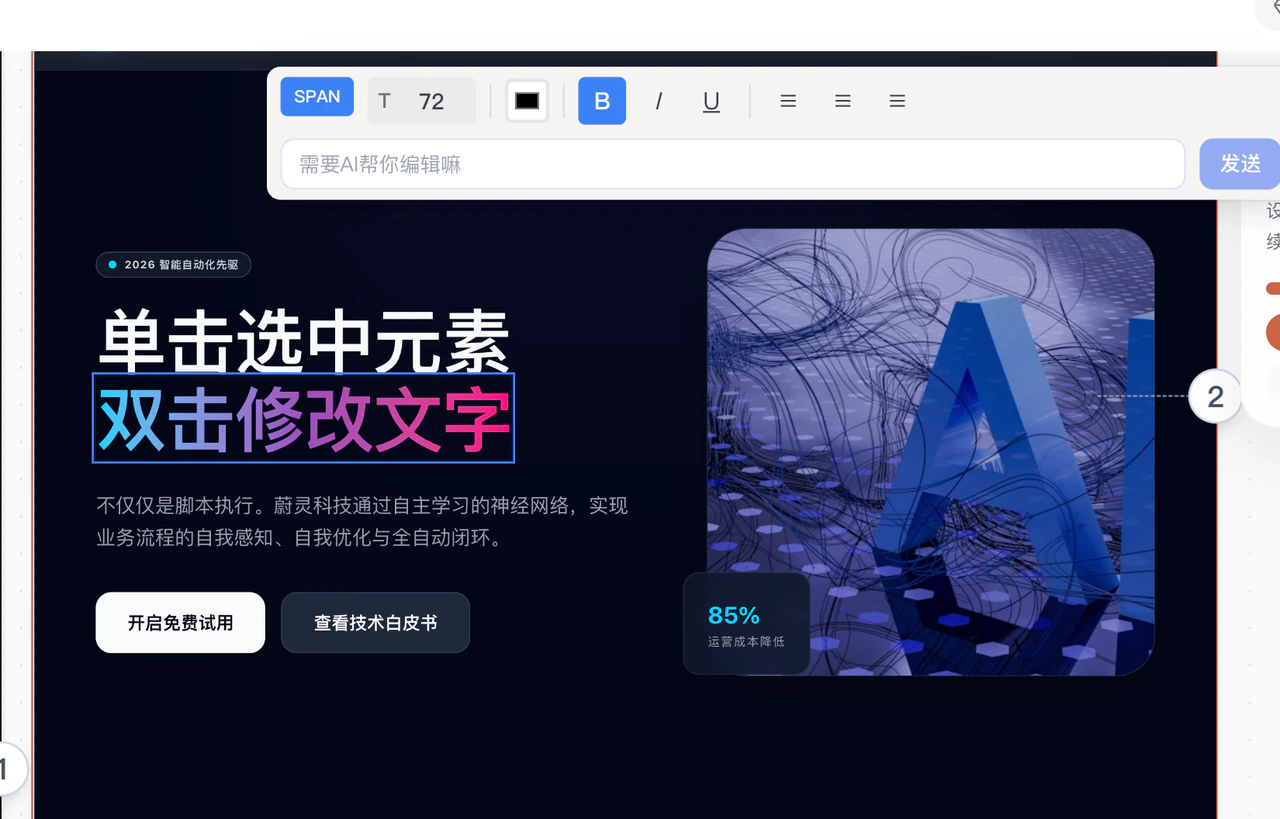
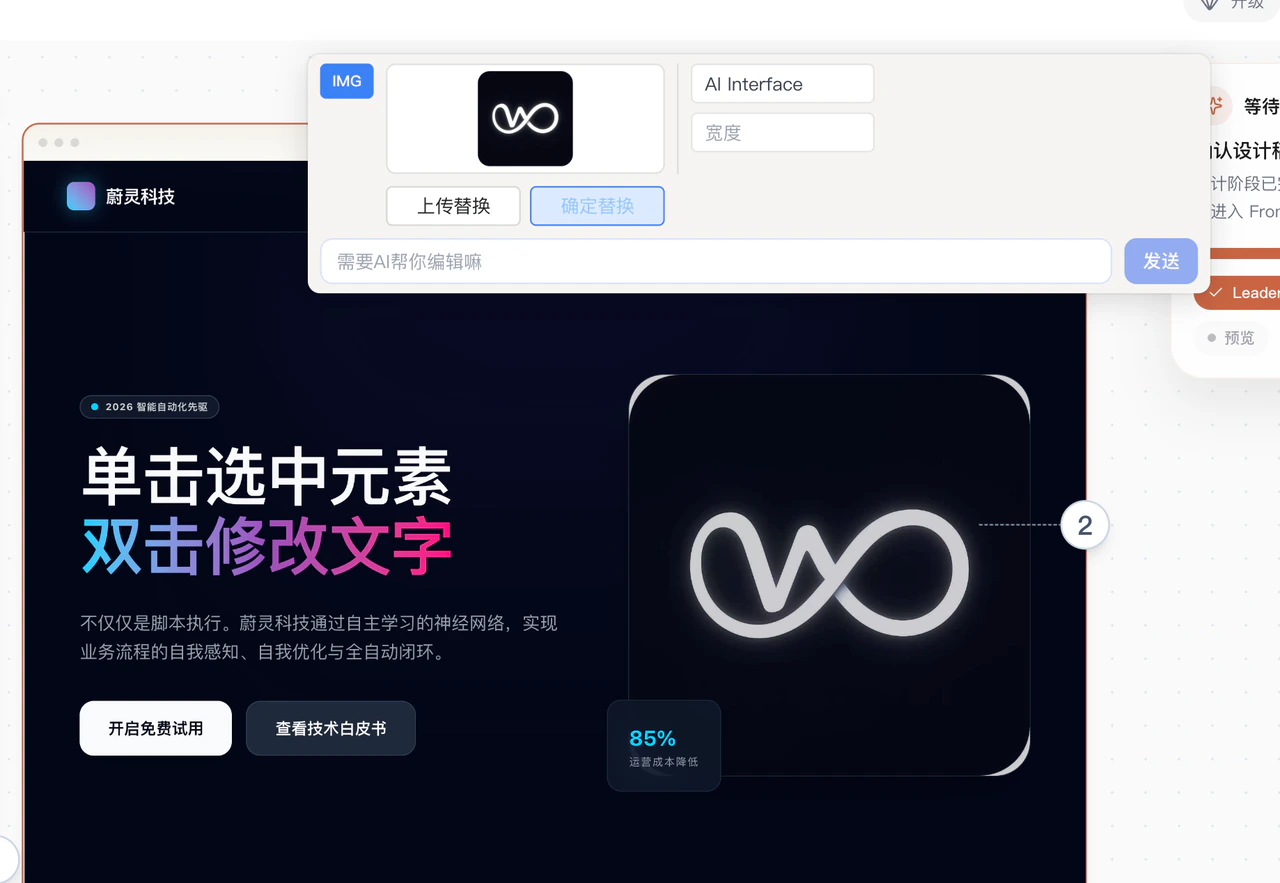
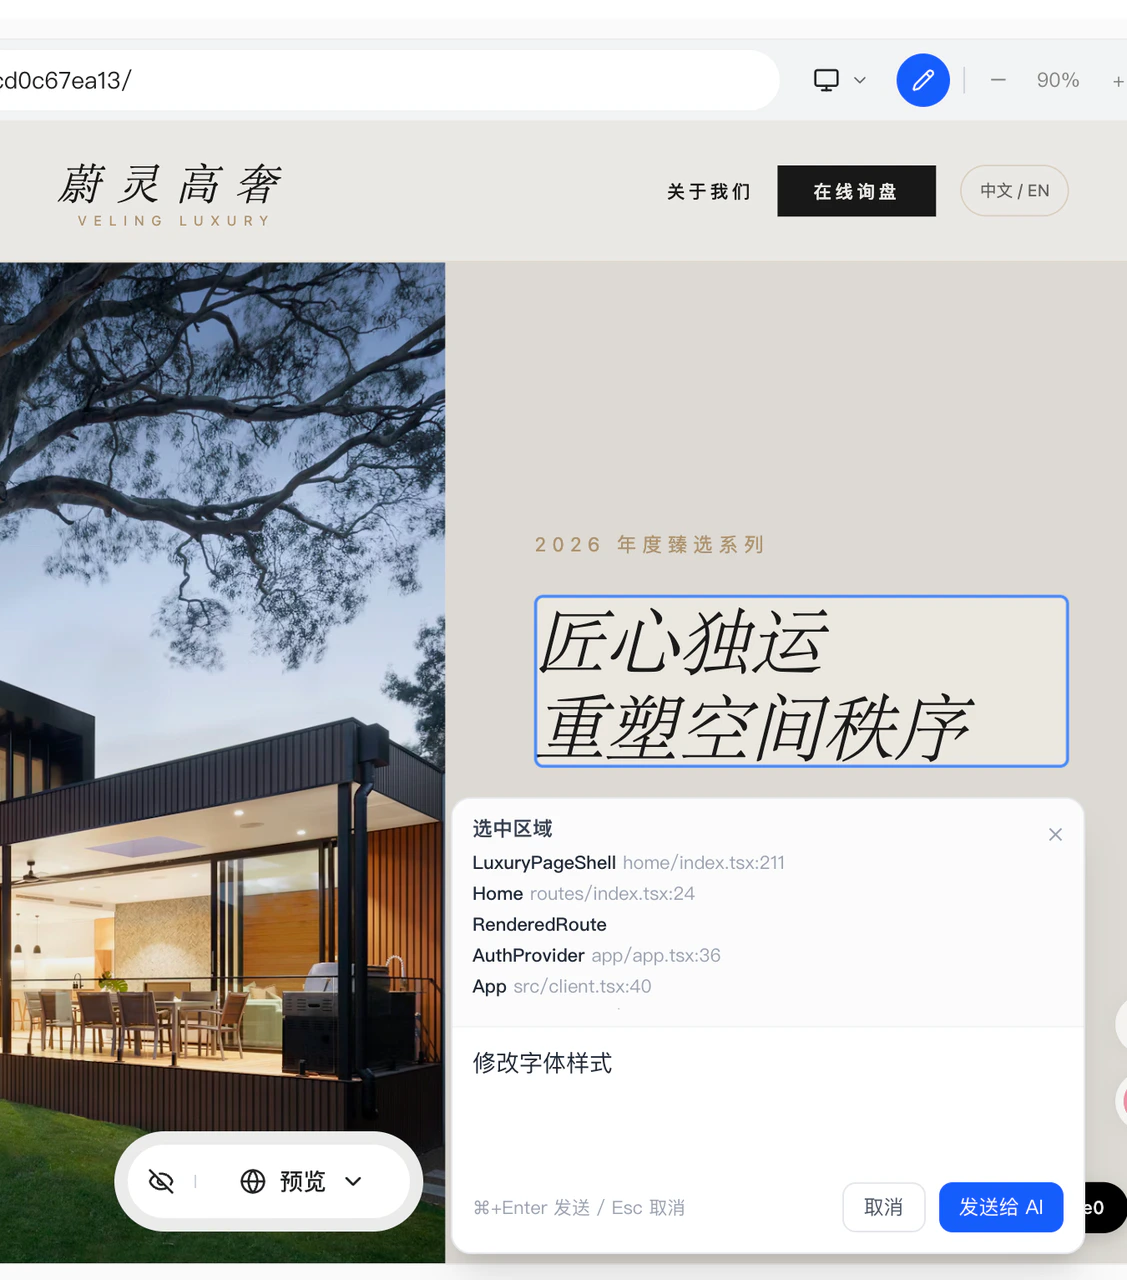
Step 4: Refine Website Content
- Example: Click “Modify Design”: Change the overall UI style, add mobile page adaptation, add pages, enrich content, etc.
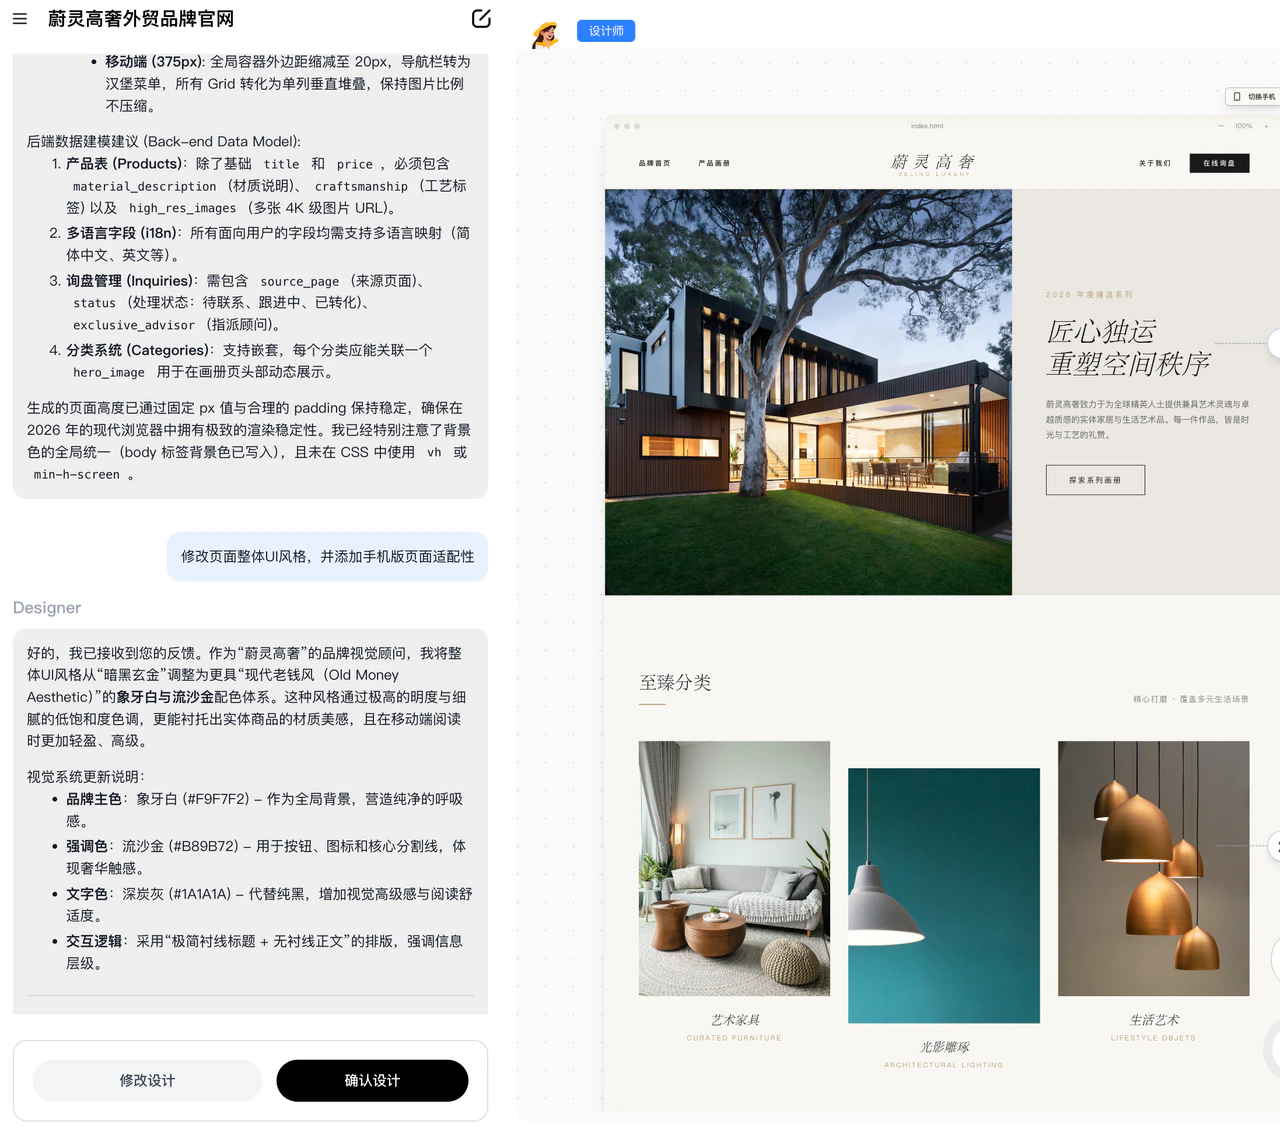
- Example: Click on text or images: Edit text or images directly on the canvas, or let AI help you modify them
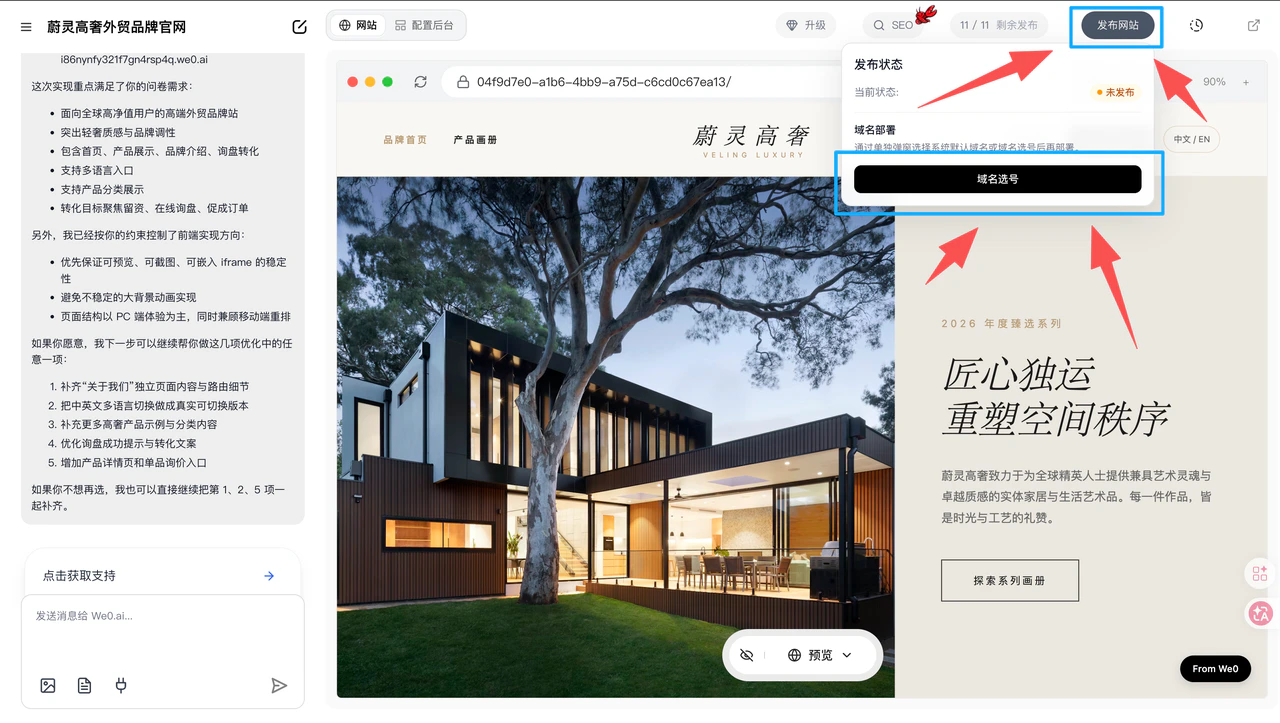
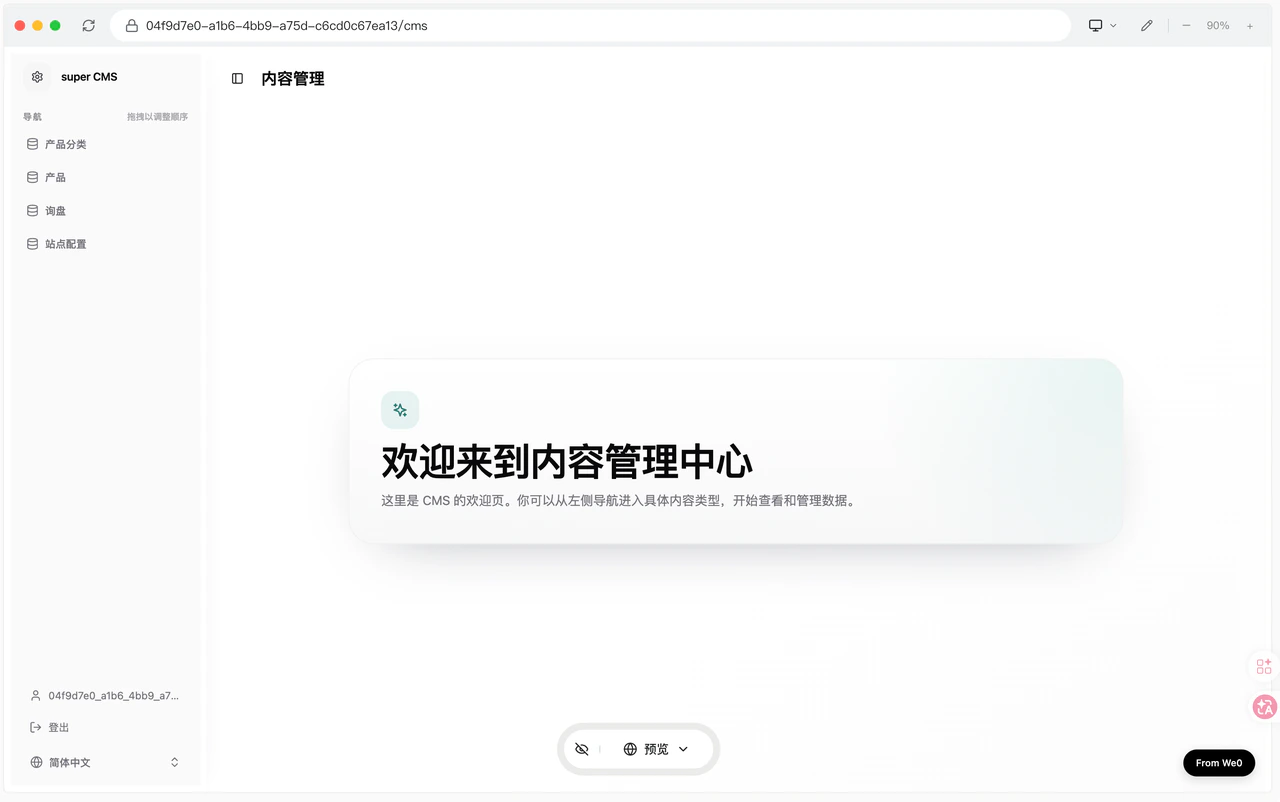
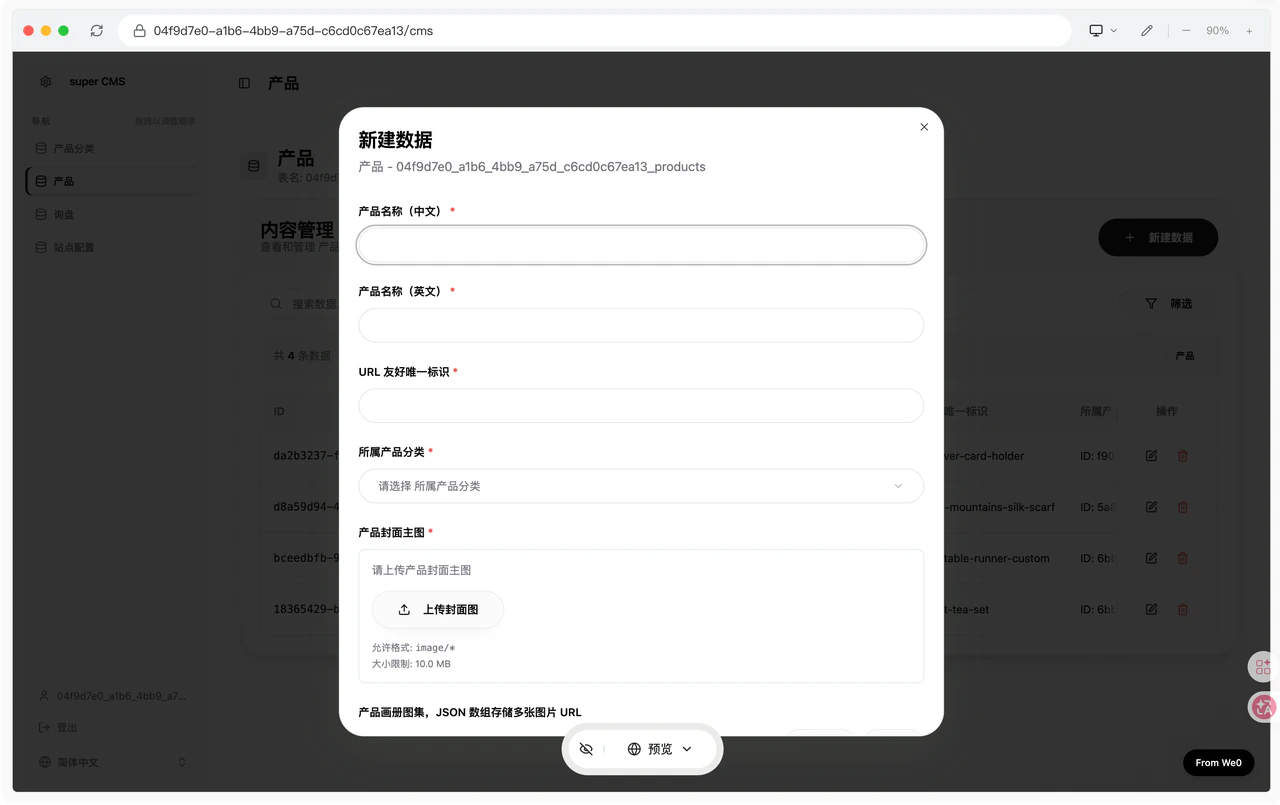
Step 5: Configure Backend & Pre-Launch Checks
After entering the preview page, click “Configure Backend”. For the first login, enter your backend username and password (make sure to remember them)
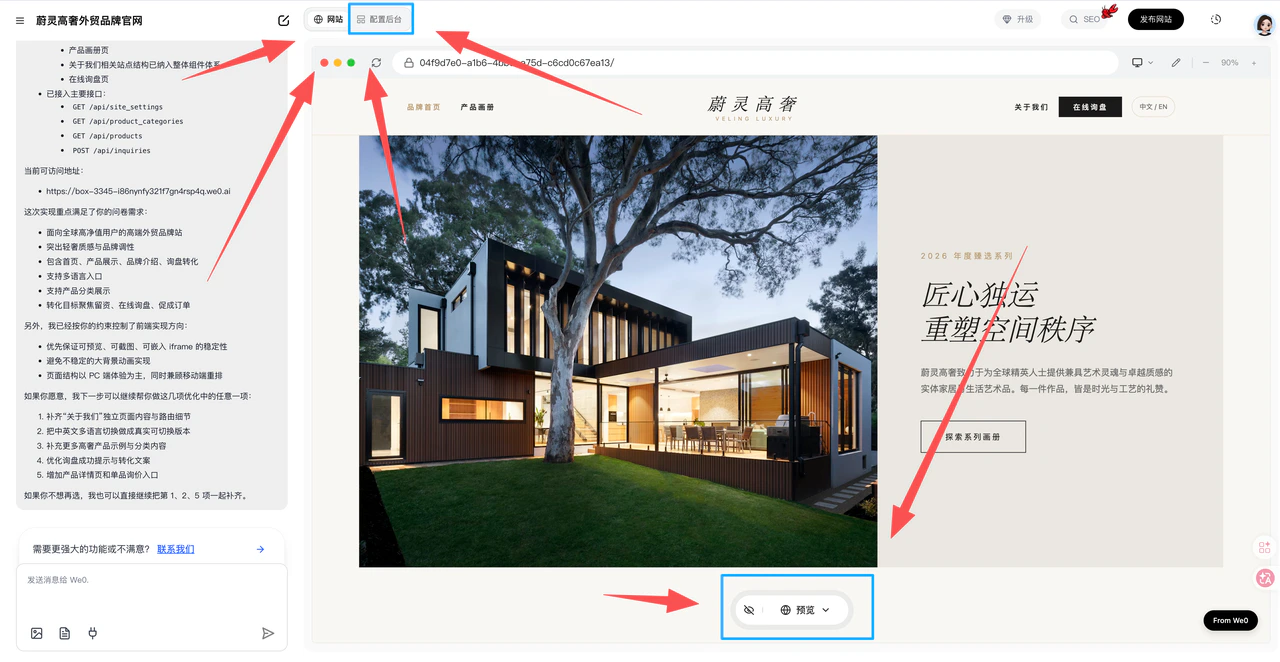
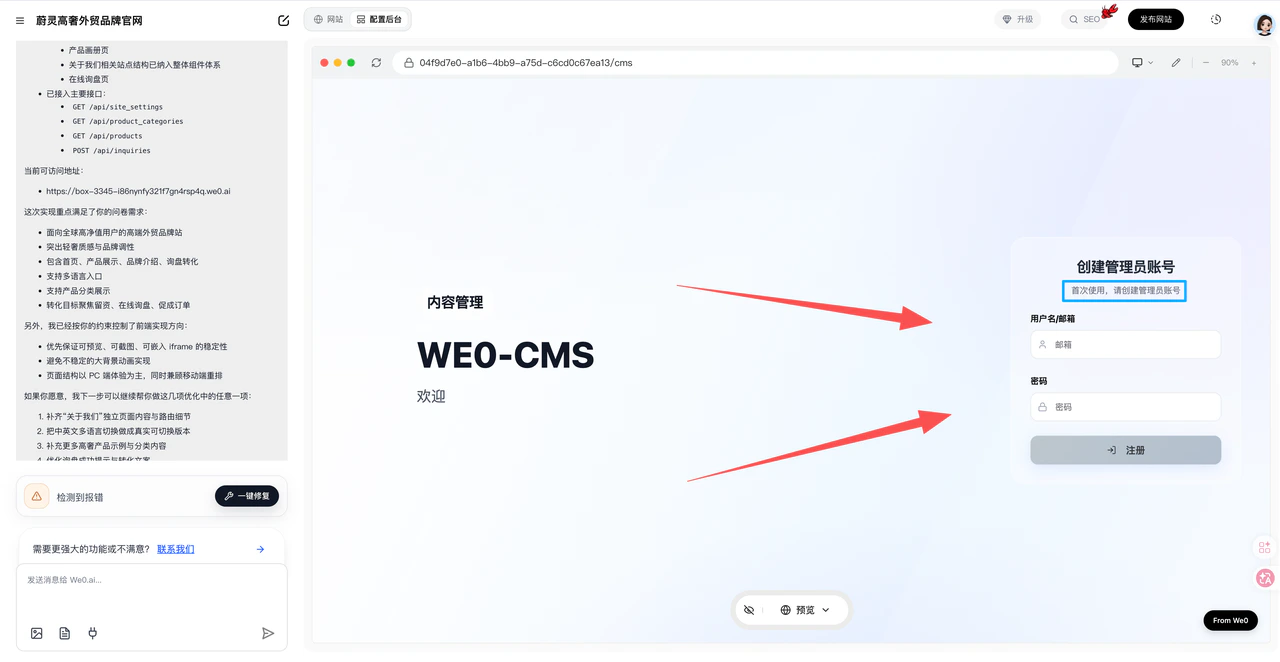
The backend will generate sections corresponding to the frontend content (e.g., products/articles/images)
Before going live, make sure to confirm:
- Page content is complete
- Mobile view displays properly
- Forms, buttons, and contact info work correctly
- Page titles and descriptions are appropriate
- Backend configuration is complete
- Website is accessible
If there are issues, use the “Magic Brush” or the chat dialog to request AI modifications
Once everything looks good, click “Publish Website” to select a domain and publish